Create a human face with Amapi
Short tutorial for fun
The model had been created with Amapi and ray-trace rendered with StrataVision 3D 5.0
These few lines are not a well structured tutorial. So, if you are an Amapi beginner, it may avoid wasted time.
 |
 |
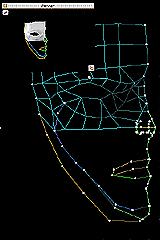
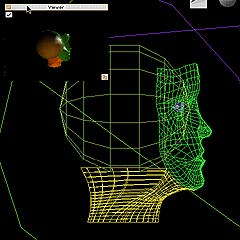
To draw this face, I had spent about 4 hours, but it was my first one! I think that
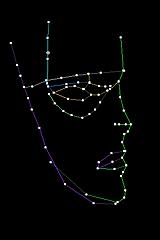
with training one can do better. One begin with the polyline tool. One draw the side-face, the outline of the eye, of the eyebrow, of the mouth, all with this tool. To get a minimum number of faces, avoid to draw too much points. Then, with the tools |
 |
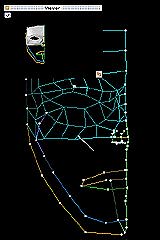 |
Then, with the facet tool
we will build the model face by face. With the viewer, we can watch to the general shape. Because the file is very small (about 10 kb), the working is very easy (even with a 6100/60!). On the middle of the model I added a line which supports the facets. Sometimes, I have to add or remove points on the curves. If one must add many points on a curve, one can use the smoothing tool. |
 |
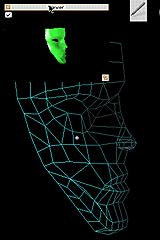 |
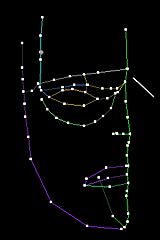
Now, that is it! Finally, it was not so difficult! This phase is generally quite fast. Now, we have to adjust all very carefully to give to the model the hoped appearance. To do this, use the tools One can make the nose bigger |
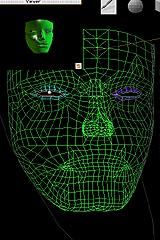 |
We symetrize it to get the second half face and weld them together. Now, smooth
One can use the eye contour to make the eyelids (easy: once the line drawn, one give it a small thickness)
|
 |
It remains to draw the neck with the hull tool, to tinker the rear of the head with
pieces of sphere cut and pasted. Your model begins to be handsome! It is not really a top
model, but with a better fine-looking than De Niro featuring Frankenstein.
|
 |
A bit of smoothing and it is finished. Now, I will put it into its diving-suit.
|